
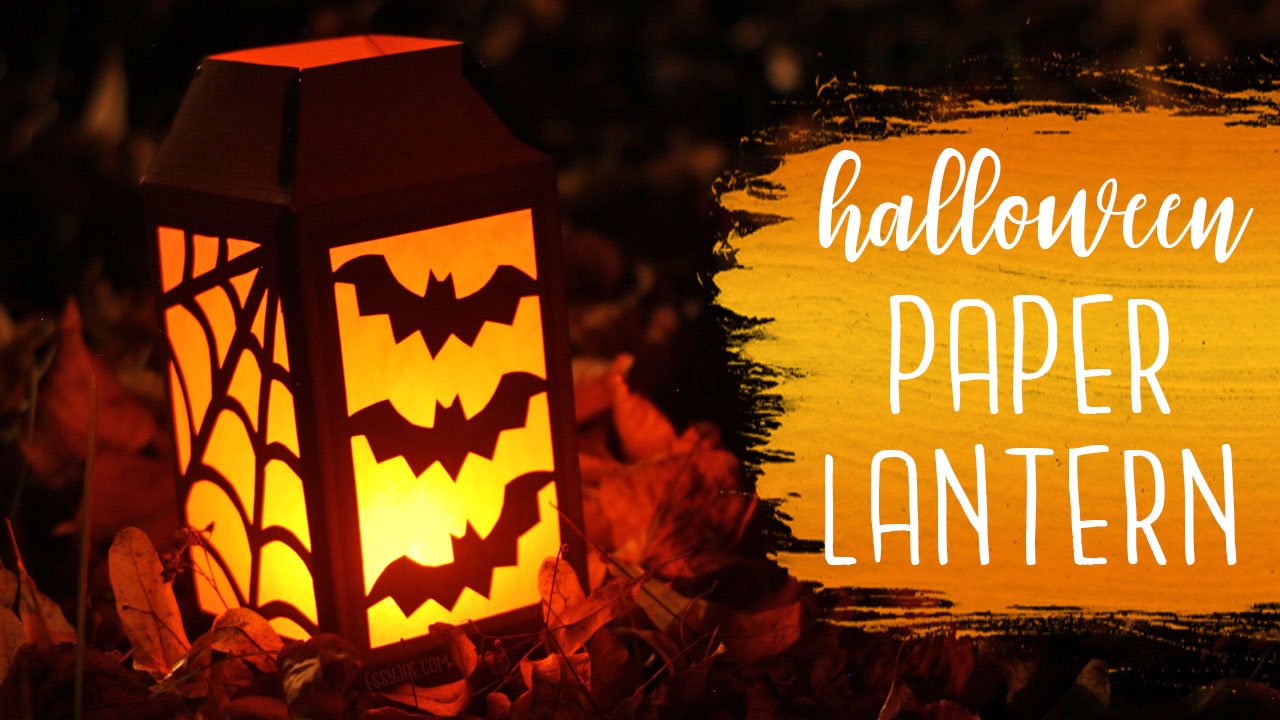
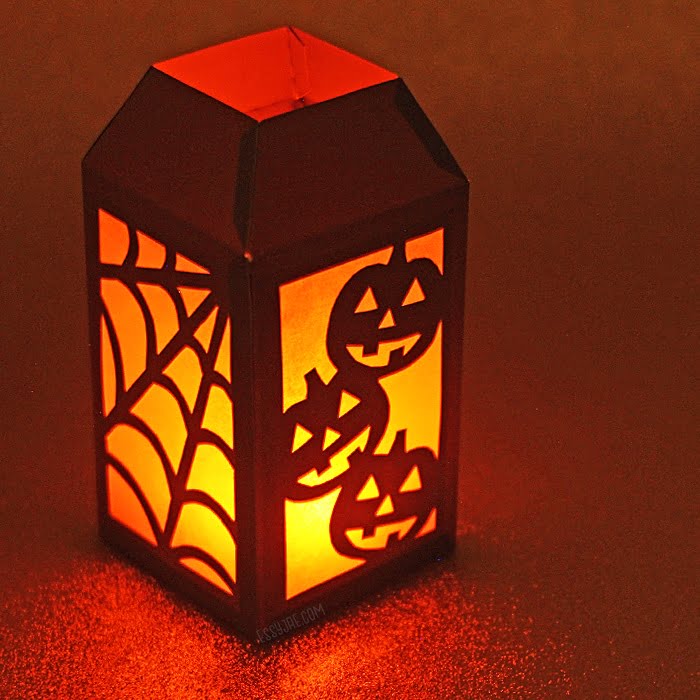
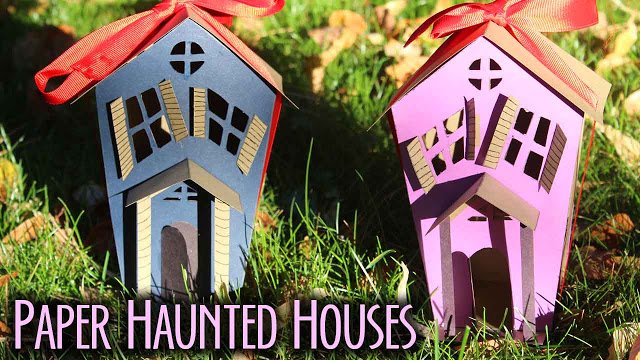
Hi everyone! With Halloween quickly approaching, this week I wanted to bring you a super fun and spooky halloween papercraft tutorial – a paper lantern! To create this lantern, we’re using a paper cut technique, but don’t let that intimidate you if you are new to paper cutting – this design is neither difficult nor time consuming to create!
Click the image below to watch the video tutorial:
These are the perfect diy decoration for a Halloween party or to light the way for trick or treaters! You could add a loop of ribbon to the top to create a handle, or to hang them from the ceiling.
Materials:
- Card stock – you’ll need paper that has some thickness to it, but not so much that it will be difficult to cut through.
- Vellum, tracing paper or other thin paper for the “glass” of the lantern – it needs to be translucent, allowing light to shine through
- X-Acto knife or other craft knife
- Glue – I used hot glue to assemble the lantern, and this Tombow mono glue to attach the vellum/tracing paper
- Scoring tool (or an old pen that doesn’t write) I use this one from EK Tools
- Ruler
- Scissors
Click here to view & print the patterns:
By using these patterns, you agree to the terms outlined here
Let me know if you have any questions. I’d love to hear your thoughts 🙂
Wishing you a happy and safe Halloween!


2 Comments
I made two of these yesterday, and they are beautiful! I don’t have a cutting machine, so I cut everything by hand with an xacto knife. I actually don’t even have a printer, so I laid tracing paper over my laptop screen and sketched the design, then used transfer paper to get it onto my card stock. It was a ton of work, but soooo worth it. Might be my favorite craft I’ve ever made! I used black card stock and alternating orange/purple tissue paper. Thanks so much for the great design – I had browsed for a long time trying to find a good Halloween lantern, and this one was by far the best. I can send you pictures if you’d like, don’t know how to post them here.
Hi Christina! 🙂 Thanks so much for taking the time to comment and share what you did! I really appreciate the kind words, and I’m glad you liked the design. I love your idea of using tissue paper, and alternating the colors – such a great idea! Yes, I would absolutely love to see them! I’ve been re-vamping the comment section on this website and today I added the ability to attach pictures. All you need to do is click the little camera icon in the lower right area when you are writing your reply. You can also send the photos to my email if you’d like: hello @ essyjae.com (without the spaces). Thanks again!