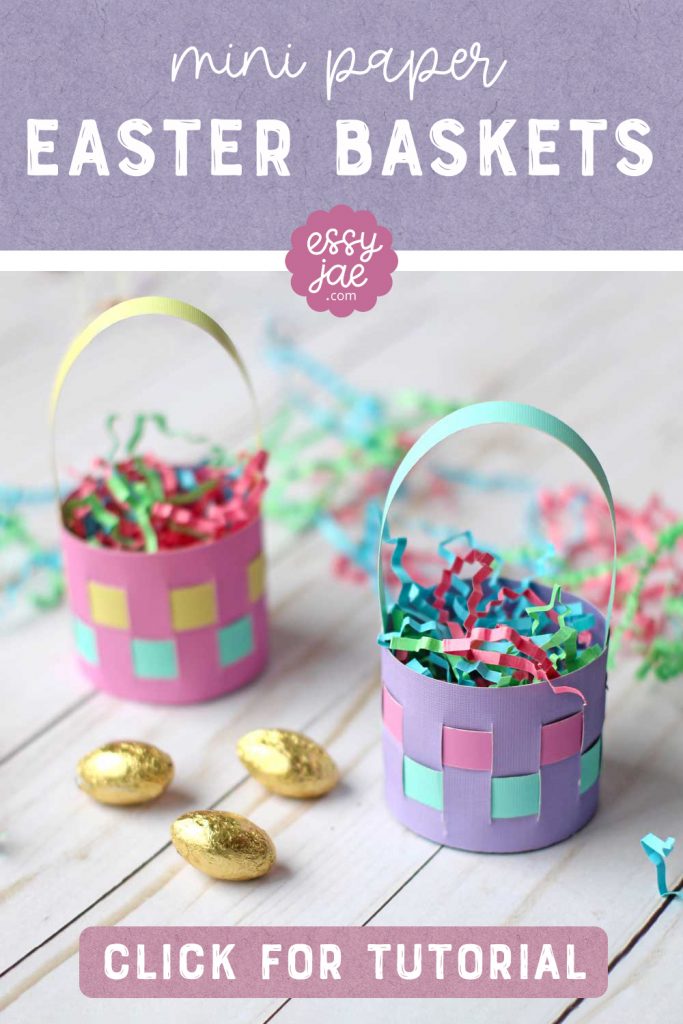
Hi everyone! Easter will be here in no time at all, can you believe it? In this week’s tutorial we’re creating another Easter paper craft – a mini Easter basket!

If you’re like me, you love anything that is miniature, and these tiny paper baskets are adorable! They are the perfect size to hold an Easter egg or mini chocolate eggs.
Click the image below to watch the video tutorial:
I’ve being doing a lot of projects that require a printed pattern lately, so I designed this one to be pattern free for those of you who don’t have access to a printer!
Materials:
- Paper in three colors (I used card stock, but you don’t have to use thicker paper for this)
- Ruler
- X-acto craft knife
- Hot glue (you can try other types of glue, though)
- Cutting mat with grid (you don’t have to have this, but it’s very helpful and will save time!)
- Rotary paper cutter (again, you don’t have to have this, but it will really help)
- Pencil
- Scissors
You’ll need to cut paper to all of the following sizes:
- 1 piece: 7.5 inches x 2 inches
- 1 piece: 7 inches x 0.5 inches
- 2 pieces: 7.5 inches x 0.5 inches
- 3 pieces: 3.5 inches x 0.5 inches
With the 7.5 inch x 2 inch piece turned length-wise, cut a vertical slit from just under 0.5″ from the top to just over 0.5″ from the bottom, every half an inch. (Or you can cut a slit every 1 inch to make an easier version)
Happy Easter!
Let me know if you have any questions 🙂